
![]()
![]()
![]()
![]()
![]()
![]()
![]()
![]()
Body Bullet Hits
Here is a very safe and effective method of making gruesome body bullet
hits using duct tape, a water balloon, and rocket igniters. Traditional
method use squibs (small explosive charges) to blast fake blood outward. However, squibs can be very dangerous and should not be used
unless you are a trained and licensed pyrotechnician. This method is
very easy and allows anyone to create realistic, safe bullet strikes on a low budget.
How it works
|
|
|

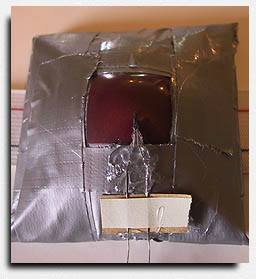
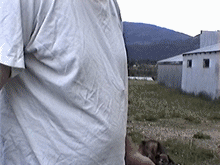
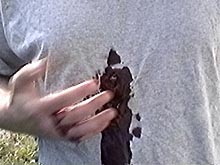
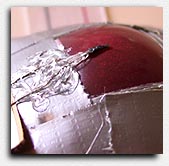
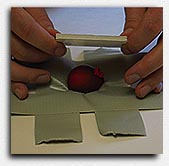
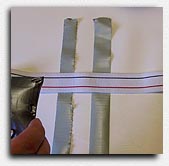
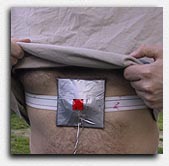
The diagram and picture shows how this method works. It's very
simple actually. A small water balloon is filled with fake blood. It is
then duct taped to a piece of foam board or cardboard. The balloon is
taped down very tightly so the fake blood is under a lot of pressure. An
opening is left in the pouch for the fake blood to escape when the
rocket igniter is fired and breaks the balloon. This method works
very well. When the balloon breaks a sudden spray of blood shoots outward giving the illusion of a gruesome bullet hit.
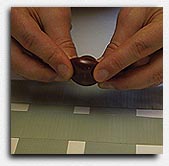
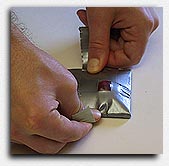
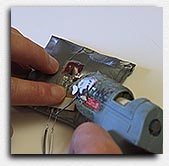
Modifying the rocket igniter
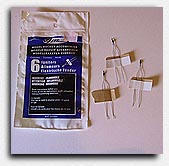
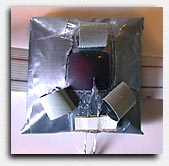
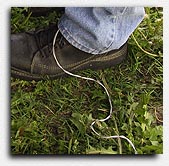
The best way to break the water balloon is with an Estes rocket igniter.
You can find them in hobby shops. The rocket igniter will need to be
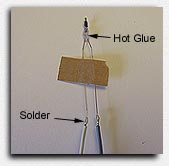
slightly modified. The igniter head is very fragile. This can be
strengthened by applying hot glue around the wires under the igniter
head (as shown in the middle photo). Solder two insulated wires about a
foot long to the end of the igniter. The igniter is now ready to be hot
glued to the pouch, as shown in the last photo.
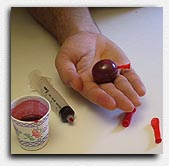
Making Fake Blood
I find this recipe very effective. It looks real, does not stain, and is
also edible.
|
4 parts- Clear corn syrup. 2 parts- Chocolate syrup. 1 part – Red food coloring. 1 part – Water 1 drop- Blue food coloring per 59ml (~1/4cup) |
For a one-cup batch use a 1oz bottle of red food coloring, 2
tablespoons of water, 4 tablespoons of chocolate syrup, 4 drops of blue
food coloring and fill the balance of the cup with corn syrup. Mix well.
You may have to play around with the ingredients to get the right blood
color. To test it, put a few small drops on a piece of tissue paper. This
way it's easier to see if it looks like real blood.
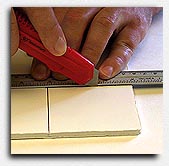
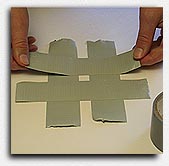
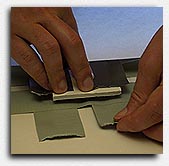
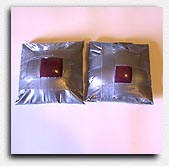
Making the blood pack
|
STEP 1 |
STEP 2 |
STEP 3 |
STEP 4 |
|
STEP 5 |
STEP 6 |
STEP 7 |
STEP 8 |
|
STEP 9 |
STEP 10 |
STEP 11 |
STEP 12 |
|
STEP 13 |
STEP 14 |
STEP 15 |
STEP 16 |
Trial and Error
|
Example 1 |
Example 2 |
Example 3 |
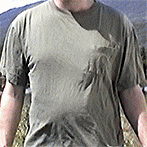
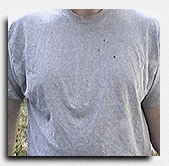
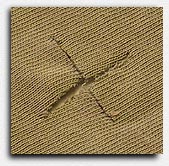
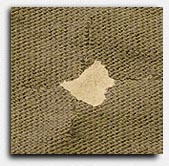
As with anything you need to practice and experiment
to get the proper effect you want. This is a very effective method if
it's done right. In example 1 we see two pouches with different
size holes. The bigger the hole the bigger the spray of blood. If the
hole is smaller the blood will shot out as a stream, as seen in example
3. This may work well for bullets exiting the body. The
camera
lens also plays a big part. In both examples 1 & 2 the fake
blood shot out about the same distance. But in example 2 the
camera is farther back and is zoomed in. Zoom lenses can make the shot
appear flat and distant. The blood doesn't appear to shoot out as far.
In example
3 the camera is very close to the subject with a wide angle lens.
This creates a more dramatic look as the fake blood almost reaches
the camera lens. So a wide angle lens works best when doing this type
of effect.
Well, this concludes the crash course on body bullet hits. If you have
any questions you can
. If you use this method on your project,
please let me know how it worked out. Good luck and have fun.